Bring your airport into view
Plug a green AirNav USB stick into the Windows PC you already own, install ADSBiq Feeder, and it feeds. About $60 in parts.
- Buy a green AirNav FlightStick and a 1090 MHz antenna.
- Install ADSBiq Feeder for Windows.
- Plug it in by a window. It finds the stick and starts feeding.
Free. Already run Linux, adsb.im or Docker? Jump to setup ↓
What to buy
A receiver stick and an antenna. Add a USB extension only if your PC isn’t near a window.
- Green AirNav Radar FlightStickabout $50Amazon ↗
1090 MHz USB receiver with a built-in filter and amplifier. No antenna in the box.
ADSBiq Feeder for Windows
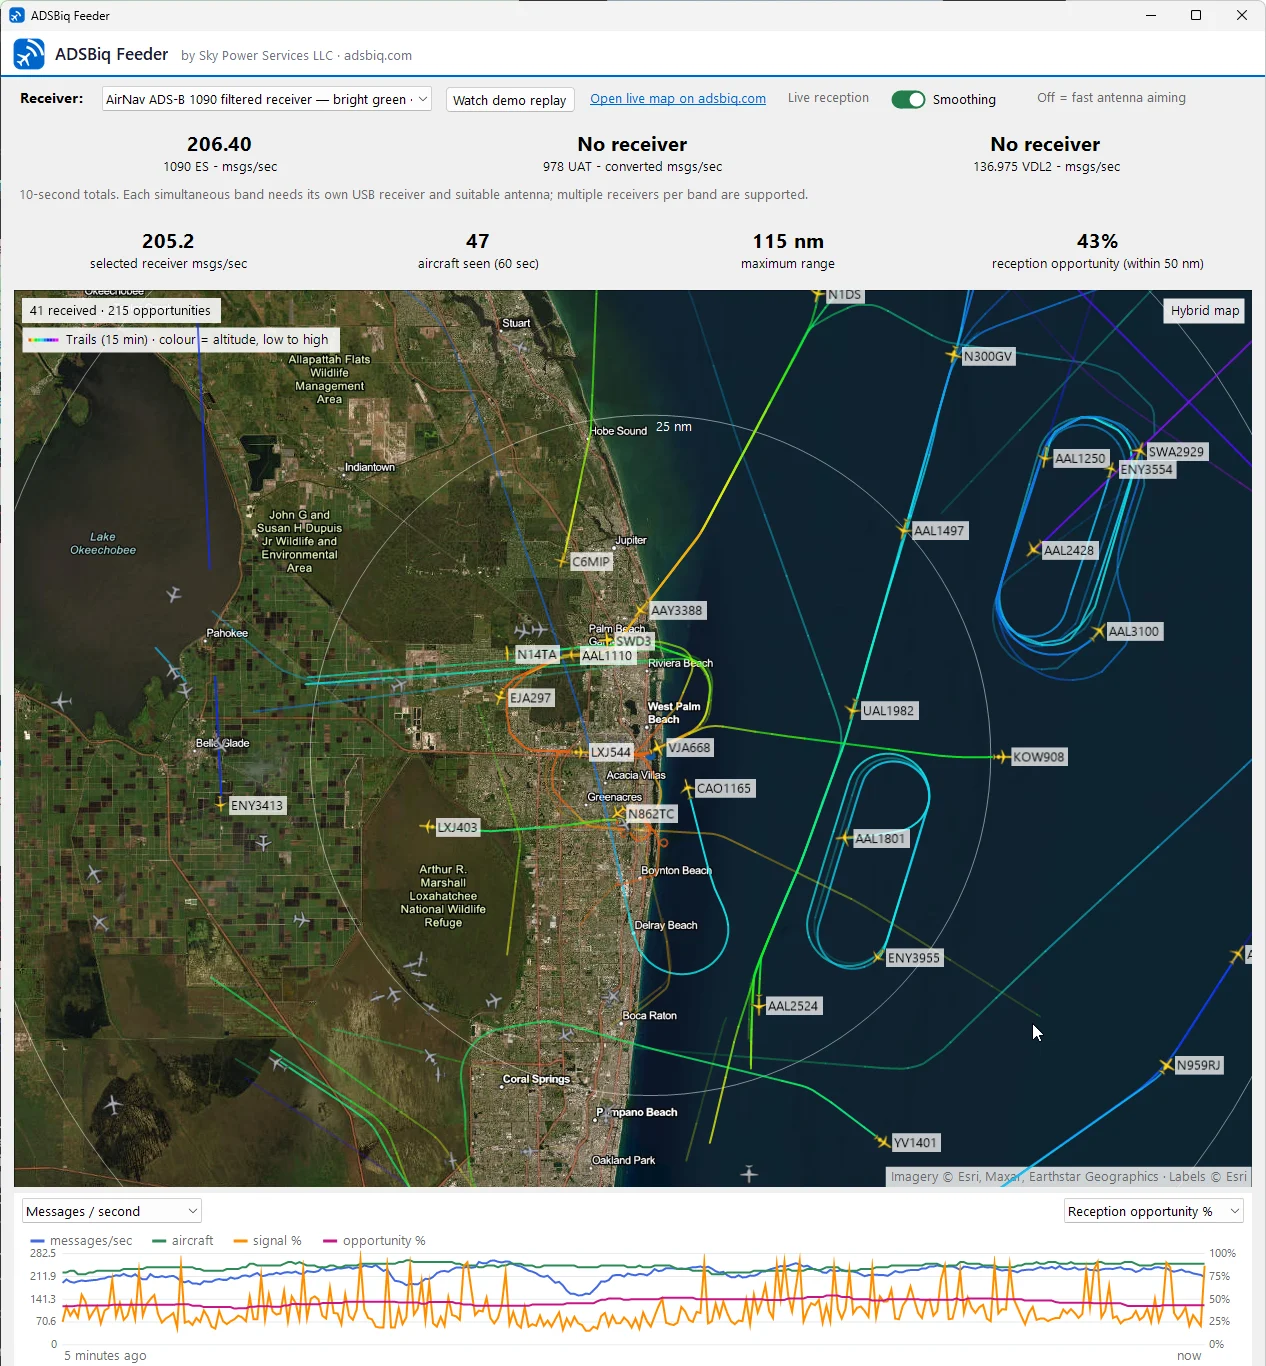
ADSBiq Feeder turns a Windows PC and a USB receiver into an ADSBiq station. Plug in the receiver and it feeds: the app installs the USB driver itself, recovers after sleep and Windows updates, and shows live aircraft, reception and gain on a map. No Raspberry Pi, no Linux, no driver tools.
Start with the antenna upright at a window that faces the airfield. Metal screens and coated glass cut the signal, so watch the aircraft count as you try a spot. Turn feeding off any time from the tray menu.
Version 0.3.17 · signed by Sky Power Services LLC · Windows 10 (22H2) or 11, 64-bit · 59.9 MB
SHA-256: 87A989F3C2AAF66A0A4C65D95D9046800029453534636A915FEDD2AEB859E986
What you get once you’re feeding
Your airport, on screen.
Flightpatch turns live aircraft data into a display people can actually use. Open your airport in a browser, select Kiosk, and put local activity on the lobby TV, the front counter or your desk.
For an FBO, flight school, maintenance shop, charter office or airport café. Another receiver at the same airport still helps: every window sees a little differently, especially near the ground.
Open the live Flightpatch airport display ↗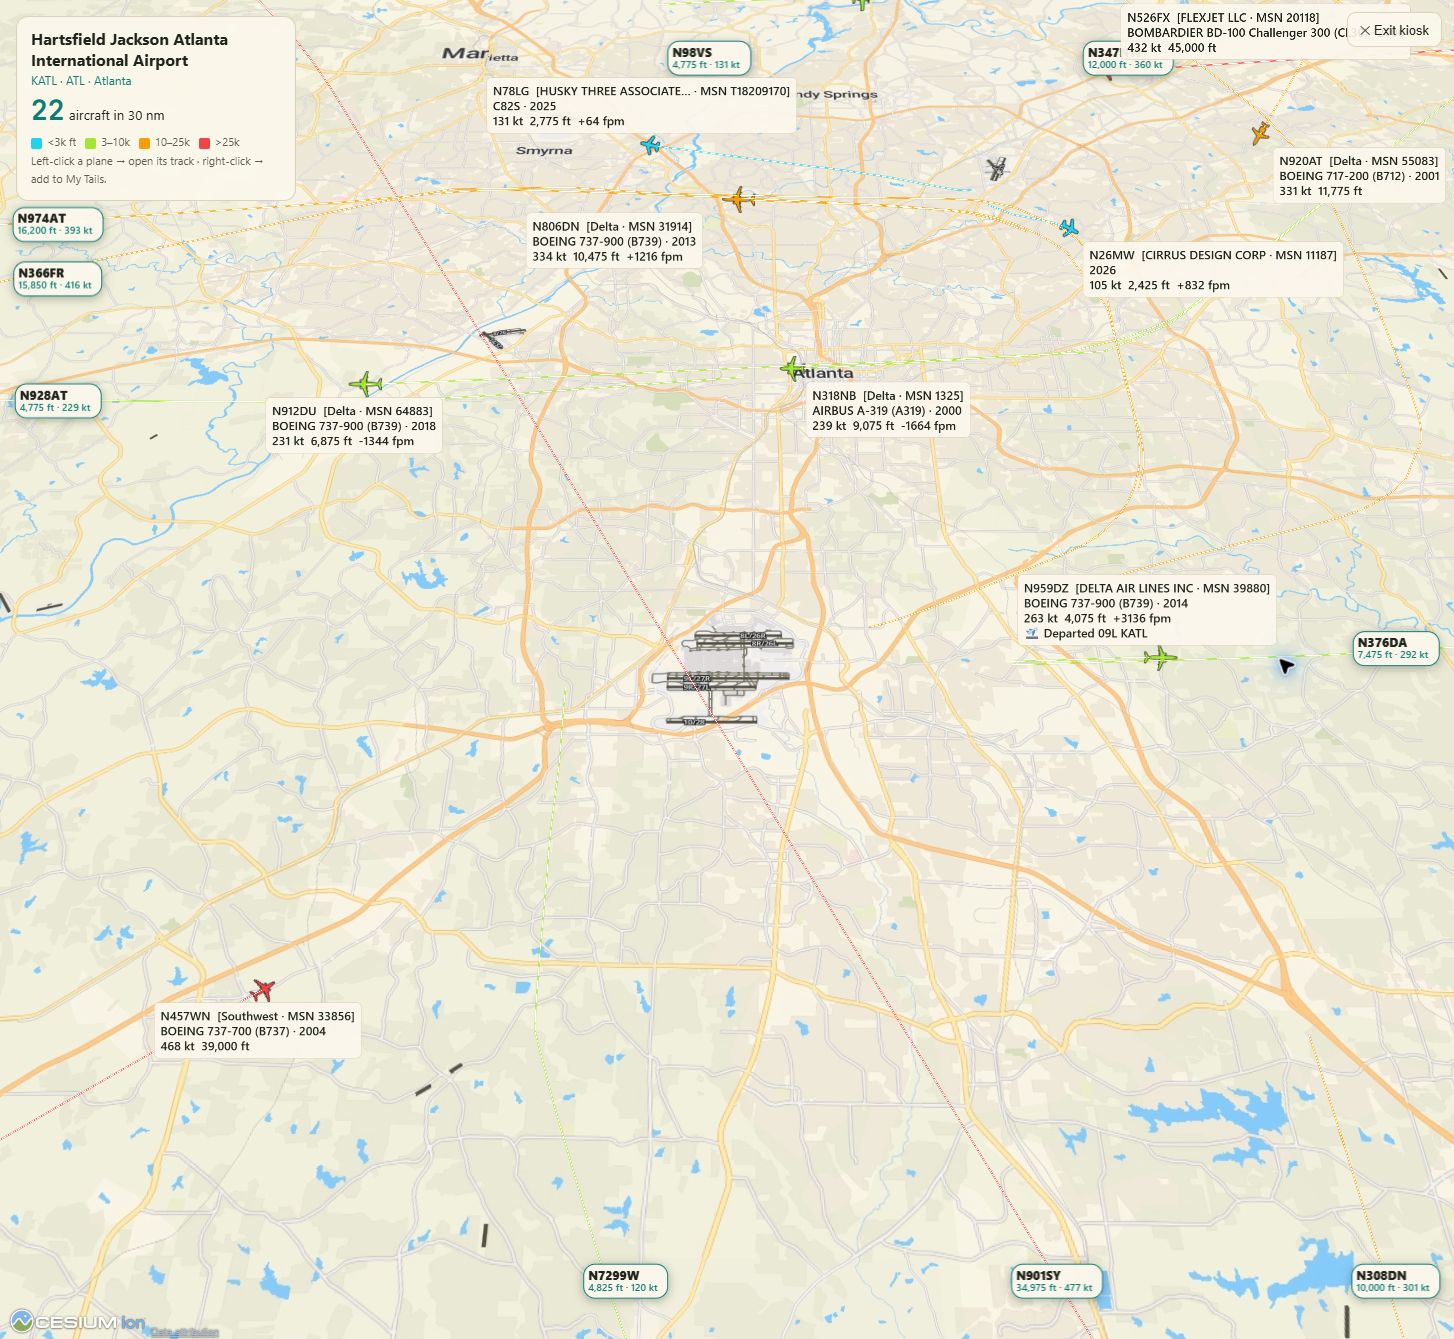
The tidy upgrade: a printed window mount
One printed part holds a PCB antenna and the stick together right at the glass, antenna vertical, joined by a 12-inch coax. Designed in SolidWorks and printed on a Bambu Lab printer. Print it in ASA or PETG-HF; PLA can soften in a sunny window.
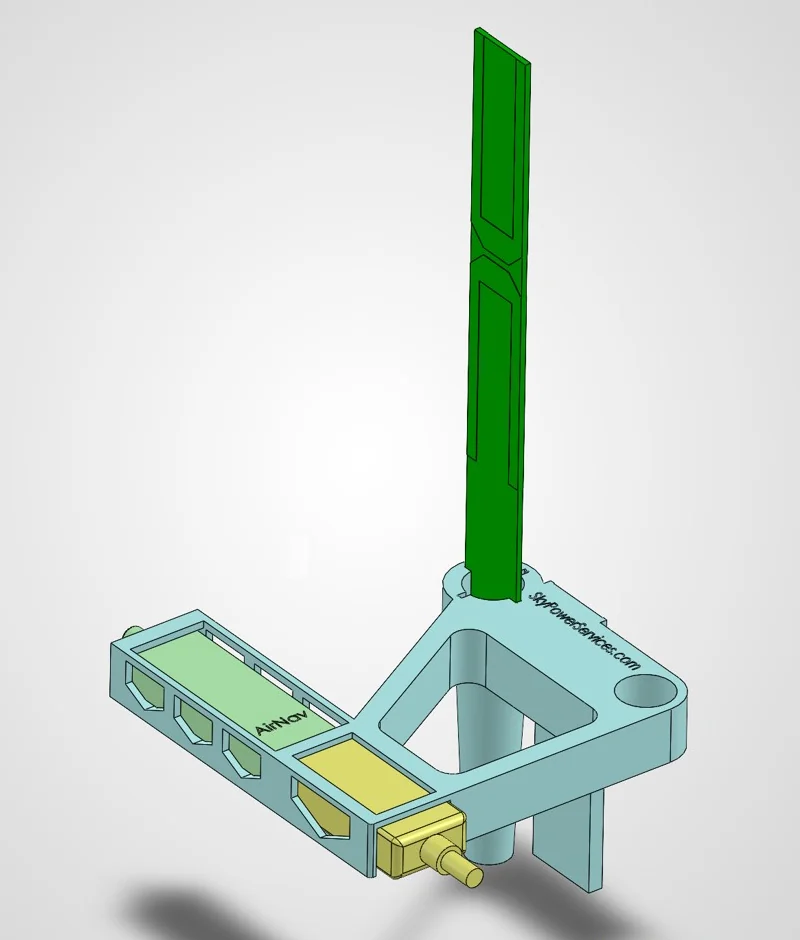
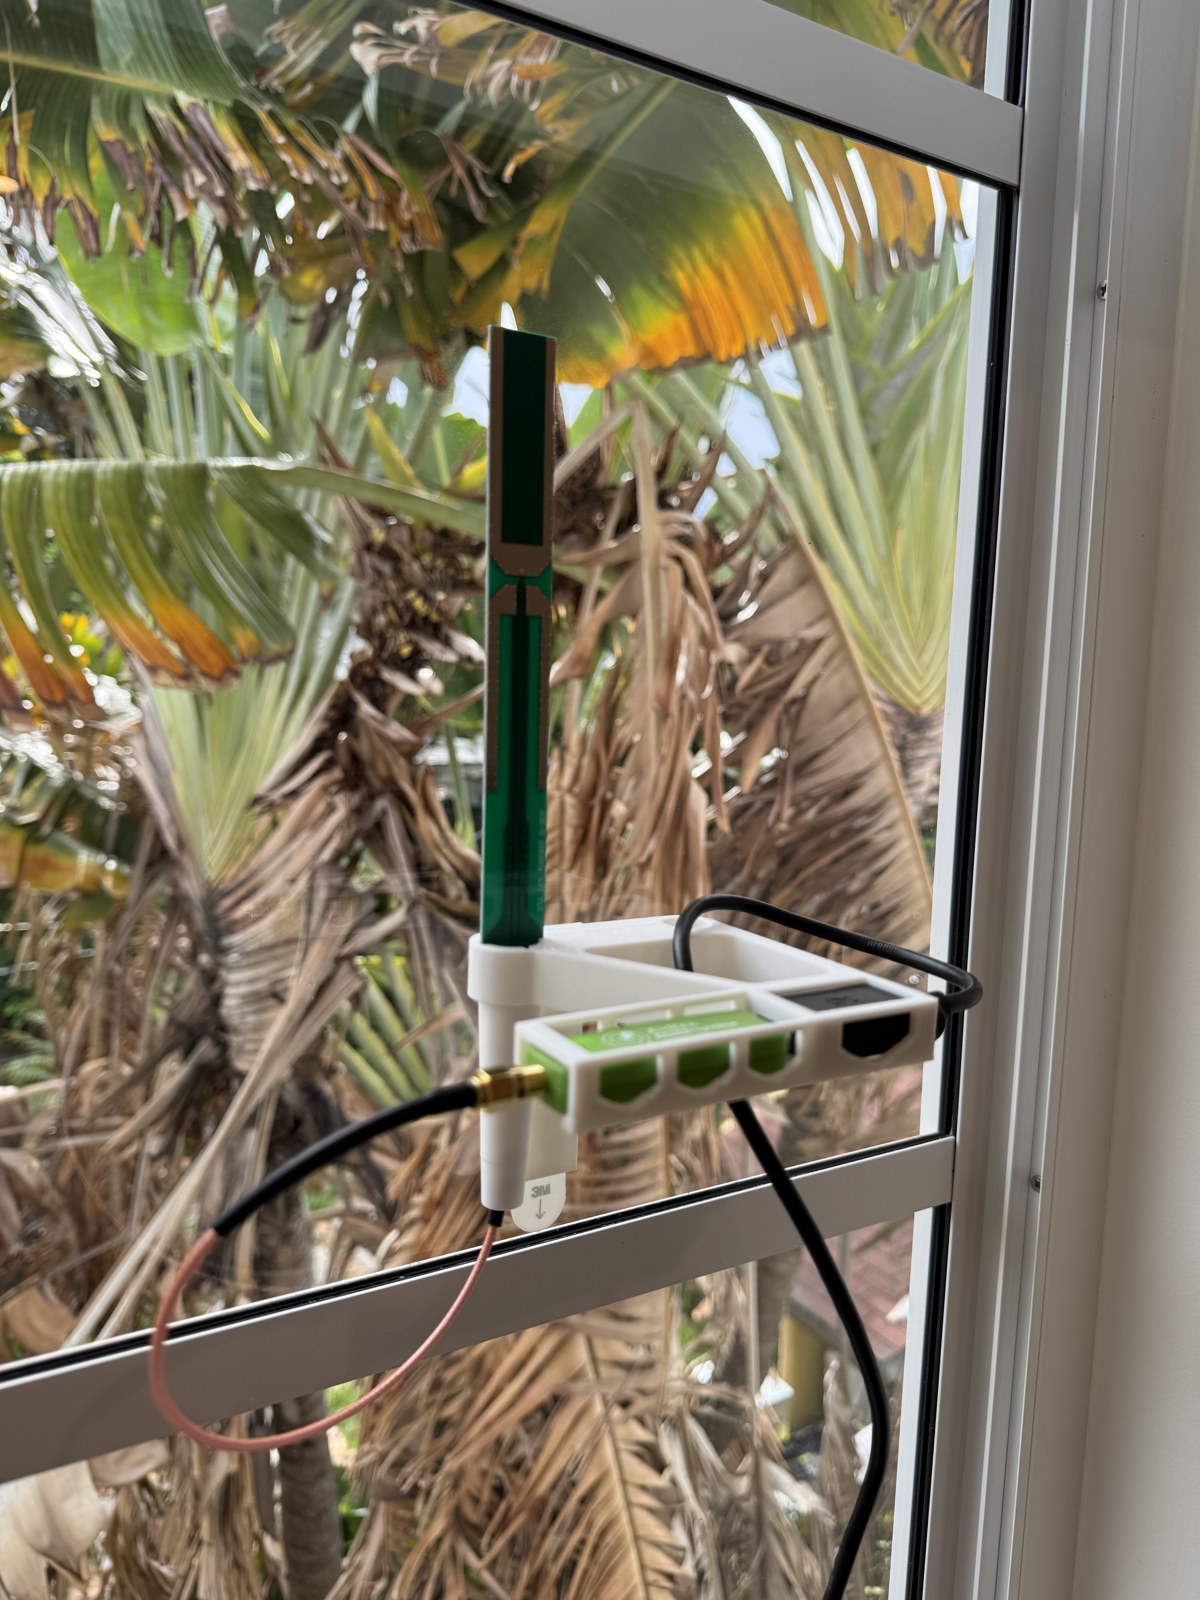
Parts for the mount build
The green AirNav FlightStick and a USB extension from above, plus:
- 1090 MHz PCB antennaabout $9Amazon ↗
E-outstanding 1090 MHz PCB antenna. Choose the pictured PCB version.
- 12-inch SMA male-to-male coaxabout $7Amazon ↗
BINGFU RG316, standard SMA both ends, not RP-SMA. Two-pack; you use one.
- 3M Command large replacement stripsabout $7Amazon ↗
Four-pack; the mount uses one strip.
Fit the antenna and stick into the mount, join them with the coax, and run the USB extension to your PC. Test reception before you press the Command strip to the glass.
Prices are approximate and Amazon listings change; check the item before you buy. Reception depends on your window, glass and surroundings. Not for navigation or safety-critical decisions.
Choose your setup
Keep every existing feed. ADSB IQ runs alongside the others.
Windows PC with a USB receiver
Install ADSBiq Feeder and plug in the stick. It installs the driver and starts feeding.
Get ADSBiq Feeder for Windows ↑


Linux-based receiver: enable ADSB IQ in adsb.im
For existing adsb.im and Ultrafeeder appliances running on Raspberry Pi or another Linux computer.
- Open the adsb.im web interface and choose Setup.
- Enable ADSB IQ in the aggregator list.
- Save. Beast and MLAT feeds connect automatically.
Running Ultrafeeder by hand? The config line is under Docker / other. Once connected, claim the feeder to name it and unlock its dashboard.
Ultrafeeder, Docker or another Linux receiver
Manual Ultrafeeder fallback: add this to your ULTRAFEEDER_CONFIG.
adsb,feed.adsbiq.com,30004,beast_reduce_plus_out;mlat,feed.adsbiq.com,31090; Another Linux, Raspberry Pi or Docker receiver? Add ADSB IQ to it in about 60 seconds → or see advanced setup.
Once connected, claim the feeder to name it and unlock its dashboard.
Already connected? Claim your feeder
See what your feeder uniquely contributes →
Already feeding through the official image or Ultrafeeder? Your station is on the map but listed as anonymous. Paste your station UUID to put your name on the leaderboard and unlock your dashboard.
📡 ADS-B — 1090 MHz
Already have an ADS-B receiver? Add ADSB IQ alongside your existing feeds in under a minute, with no conflicts.
Requirements
- A working ADS-B receiver (RTL-SDR dongle + antenna)
- Running readsb or dump1090-fa on Linux (Raspberry Pi, x86, etc.)
- Internet connection (minimal bandwidth — ~50 KB/s)
Already feeding adsb.fi, adsb.lol, FlightAware, FR24, or others? Perfect — ADSB IQ runs alongside them with zero conflicts.
Need a receiver?
The recommended Windows build is the easiest and much cheaper because it uses a PC you already own.
Build the recommended Windows receiver →Want to build on a Raspberry Pi (more expensive, but standalone)? →
Uninstall
To completely remove the feeder from your receiver:
(set -e; f=$(mktemp); trap 'rm -f "$f"' EXIT; curl --proto '=https' --proto-redir '=https' -fsSL https://adsbiq.com/uninstall.sh -o "$f"; sudo bash "$f")