Bring your airport into view
Build a receiver, watch local aircraft, and help improve coverage at your airport.
A small build.
A better view of your airport.
Print one part. Add five components. Turn a Windows PC you already own into an aircraft receiver for the ADSBiq network.
Then open Flightpatch: a live airport display for your desk, front counter, or lobby TV. A hands-on project with something useful to show for it.
One 3D print · Five purchased parts · Your Windows PC
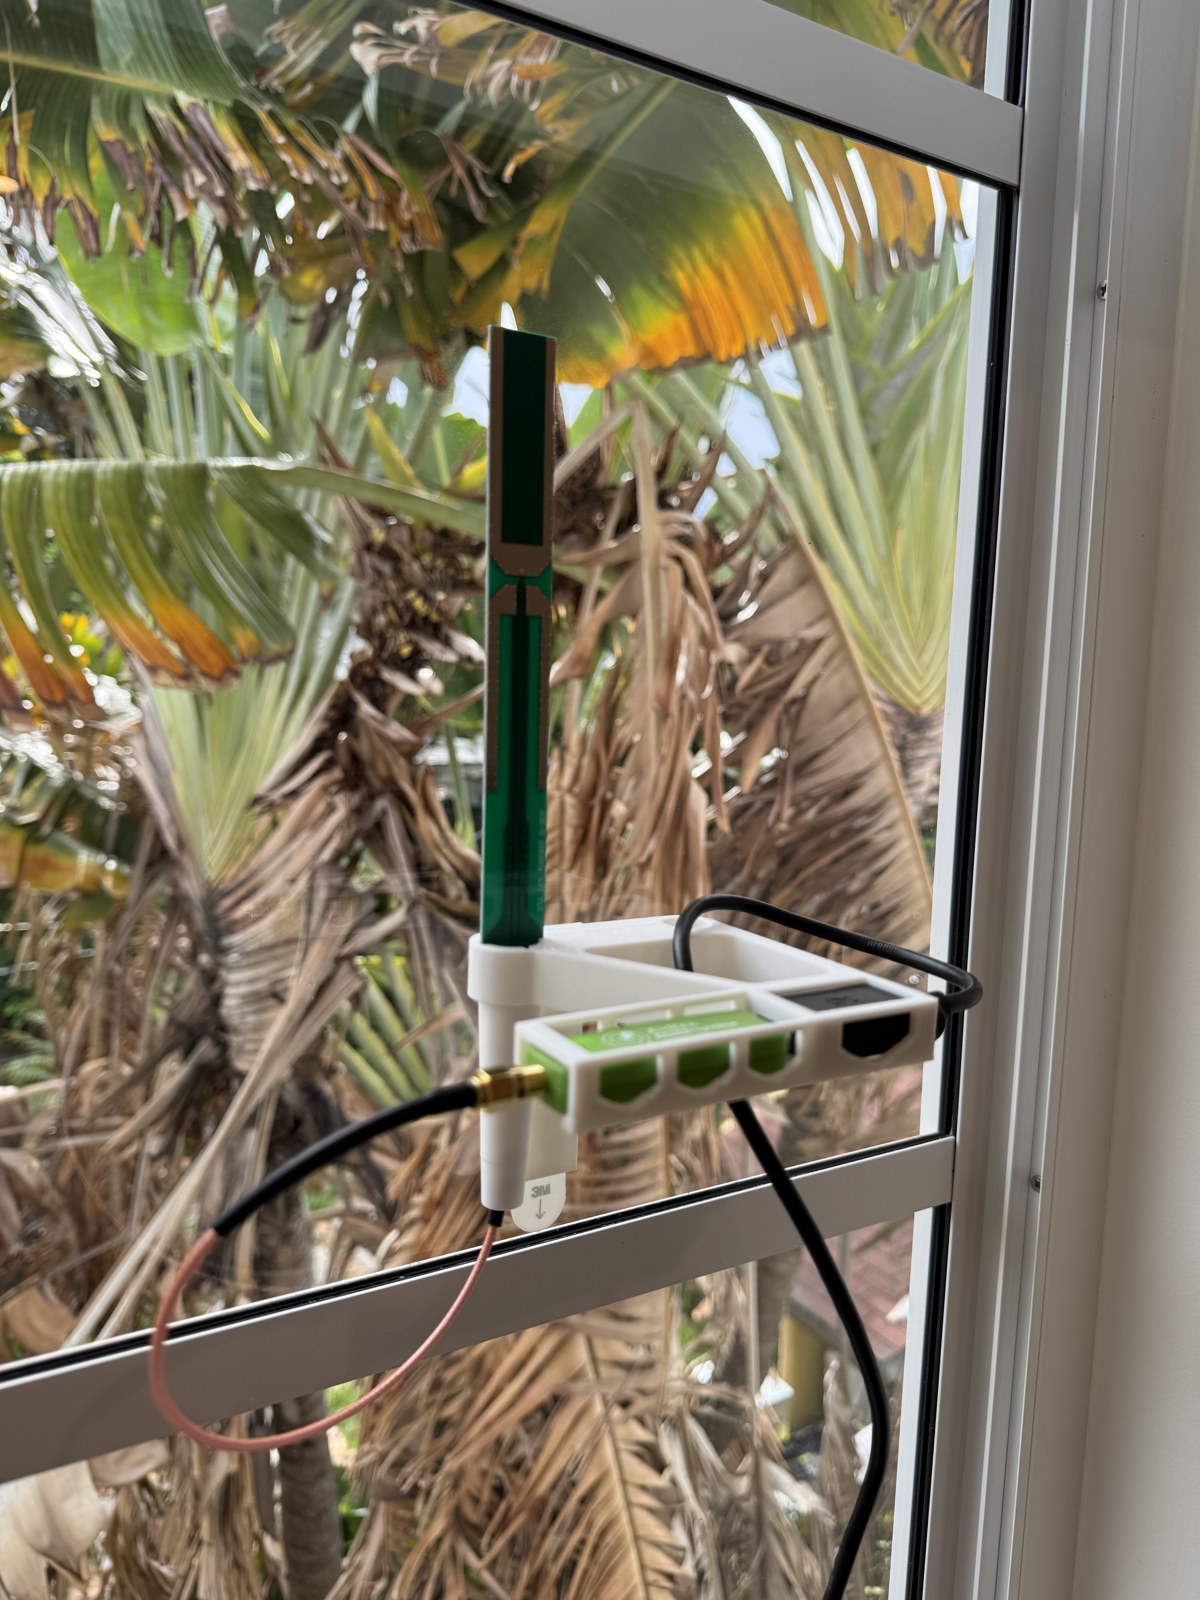
Your airport, on screen.
Flightpatch turns live aircraft data into a display people can actually use. Open your airport in a browser, select Kiosk, and put local activity where your team and visitors can see it.
For an FBO, flight school, maintenance shop, charter office, airport café, or a one-person business: the same simple idea. A useful view of the airport, powered in part by people on the field.
Open the live Flightpatch airport display ↗A receiver with a clear view can help fill local coverage gaps, especially near the ground. The map combines network observations; it is not a before-and-after measurement of this receiver. Traffic and reception vary. Not for navigation or safety-critical decisions.
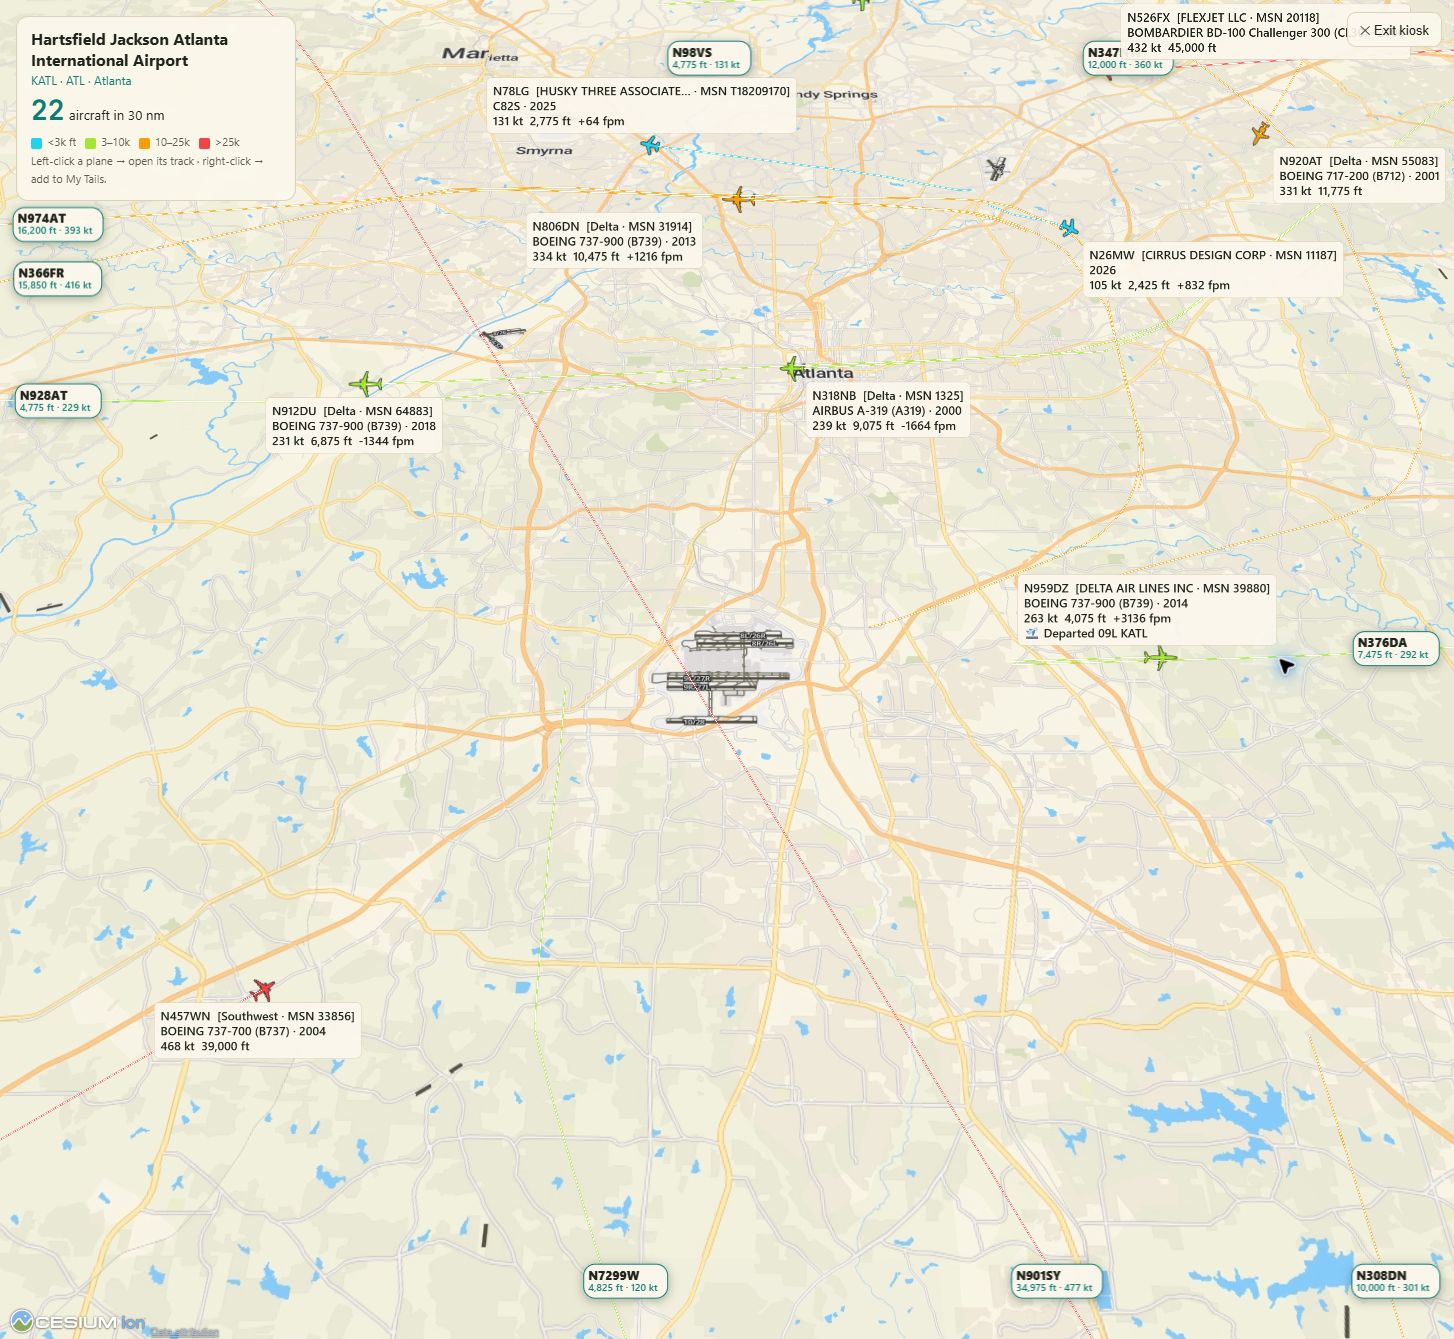
Different businesses have different sightlines. Another receiver at the same airport can still make a difference.
Bring a live view of local aircraft to your lobby, customer counter, or office.
Print the mount, assemble the receiver, and see what your location can receive.
One file. One integrated mount.
Designed in SolidWorks and printed on a Bambu Lab printer, this single part holds the PCB antenna and green AirNav receiver together. Download the finished design and print your own.
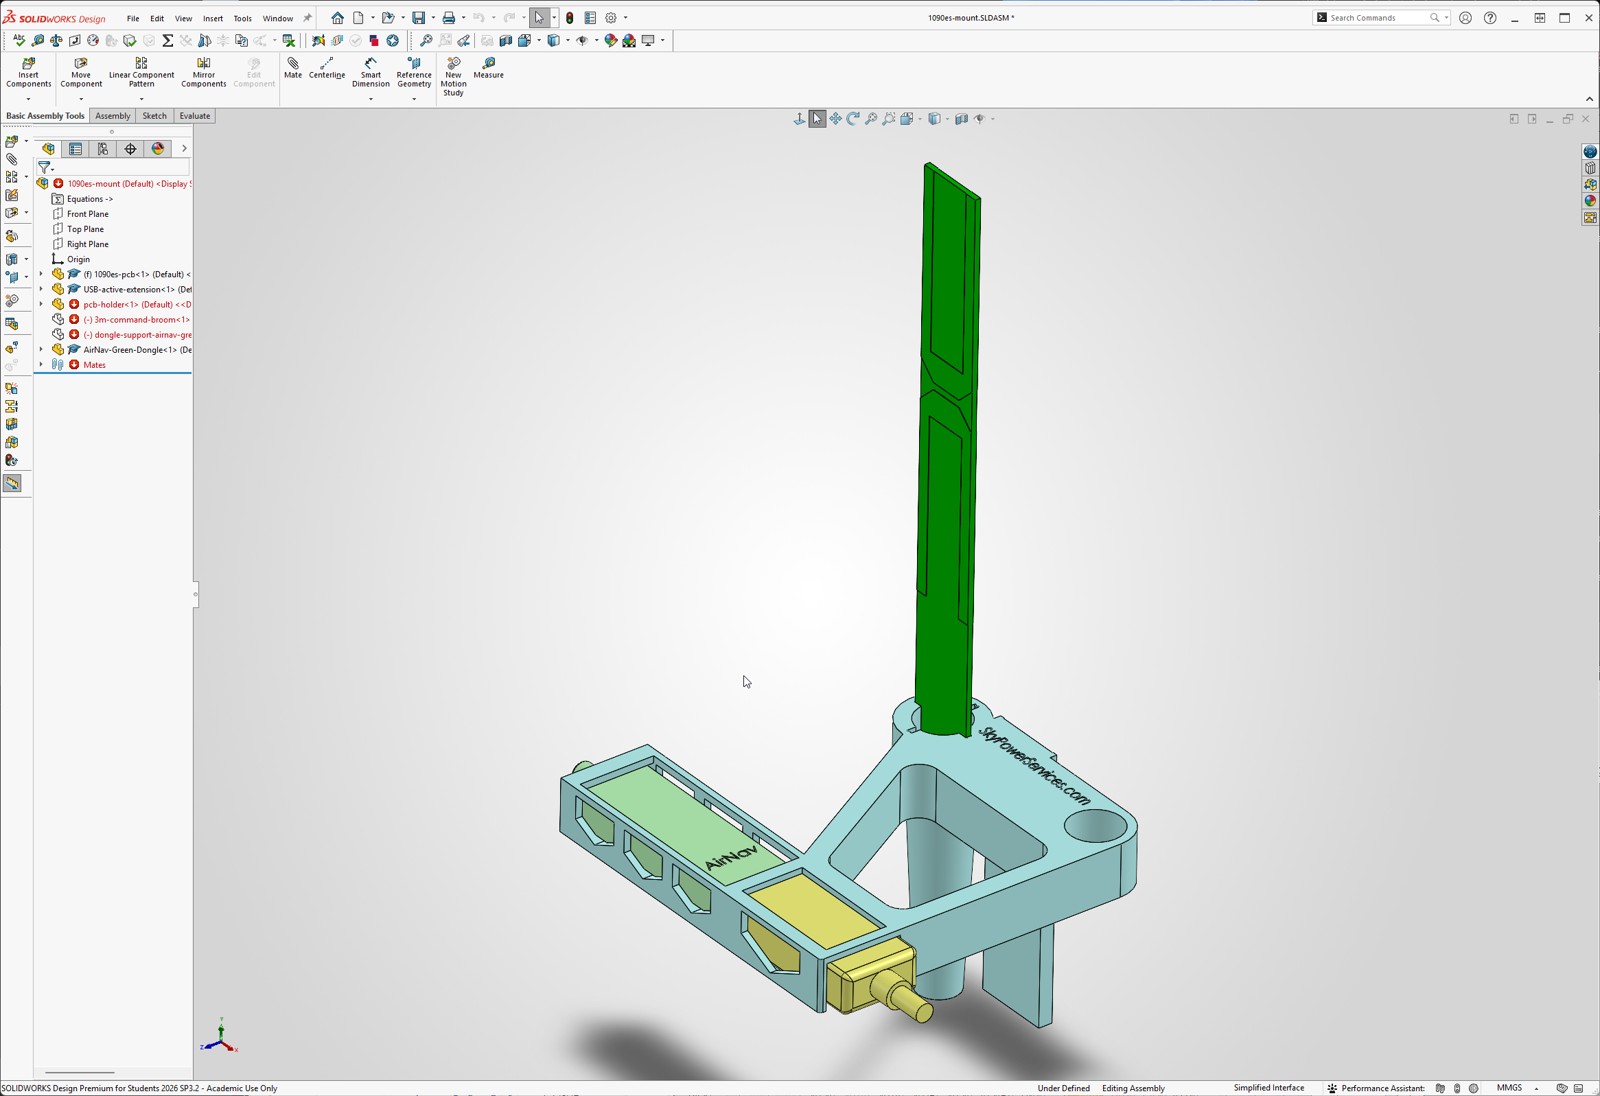
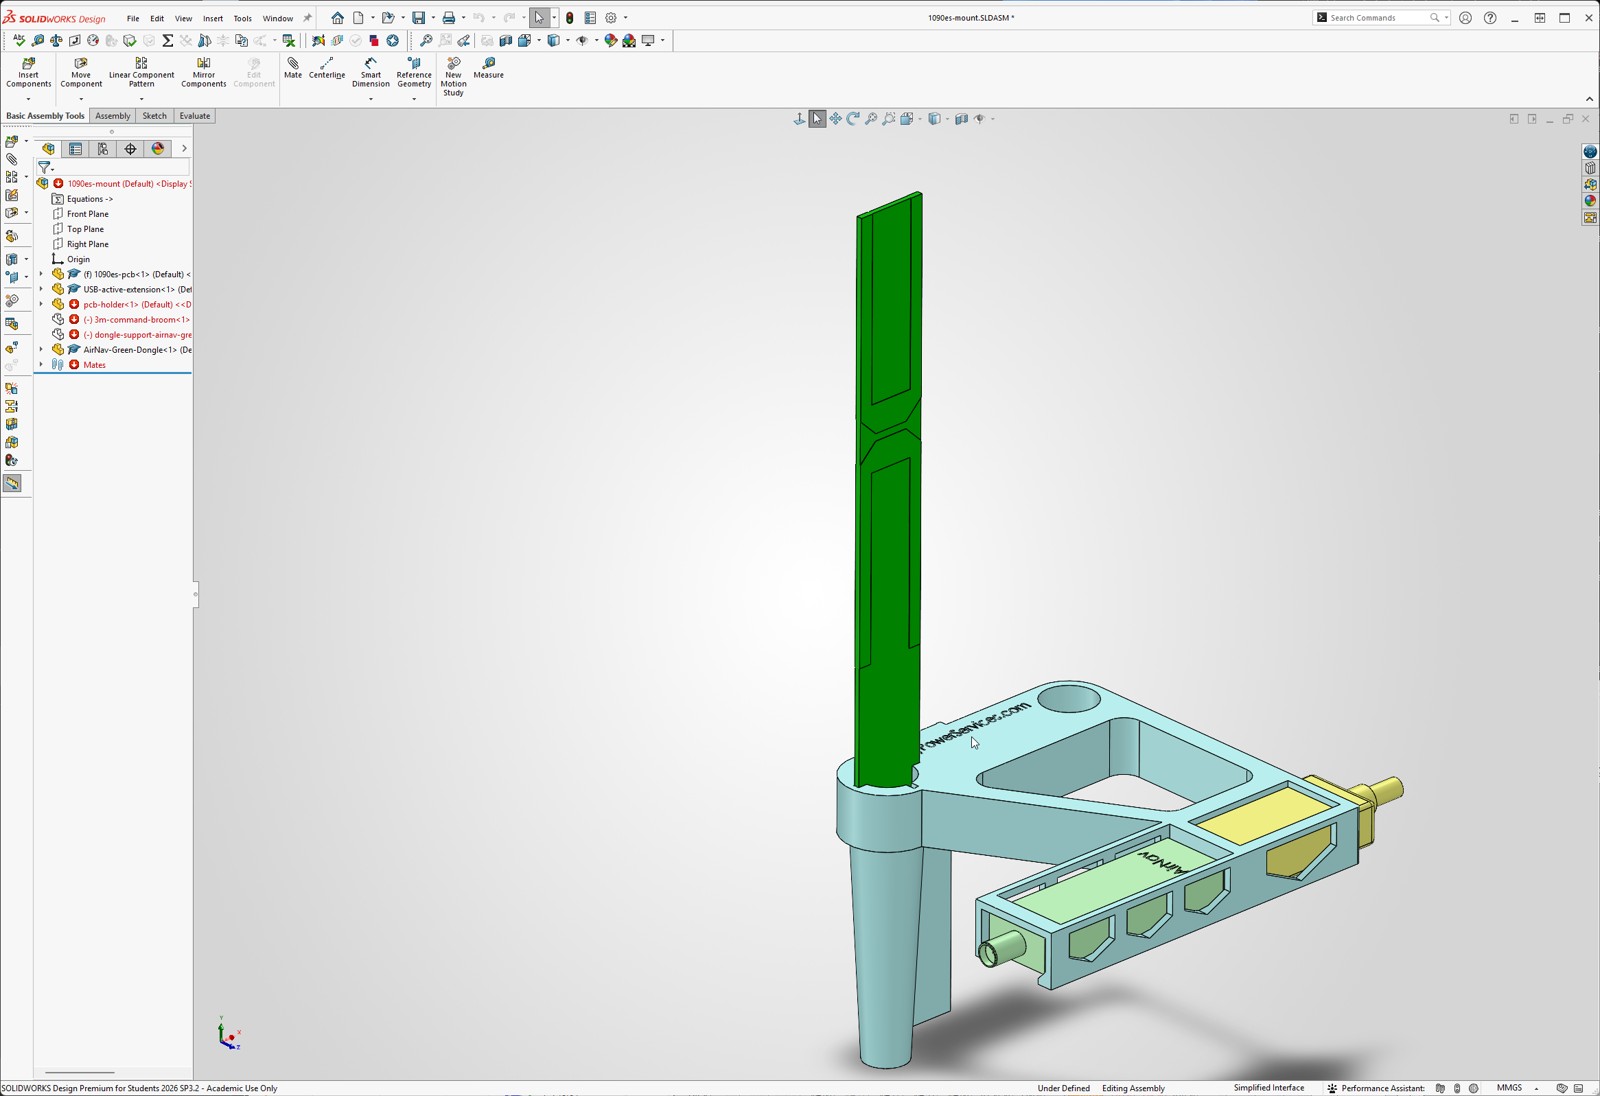
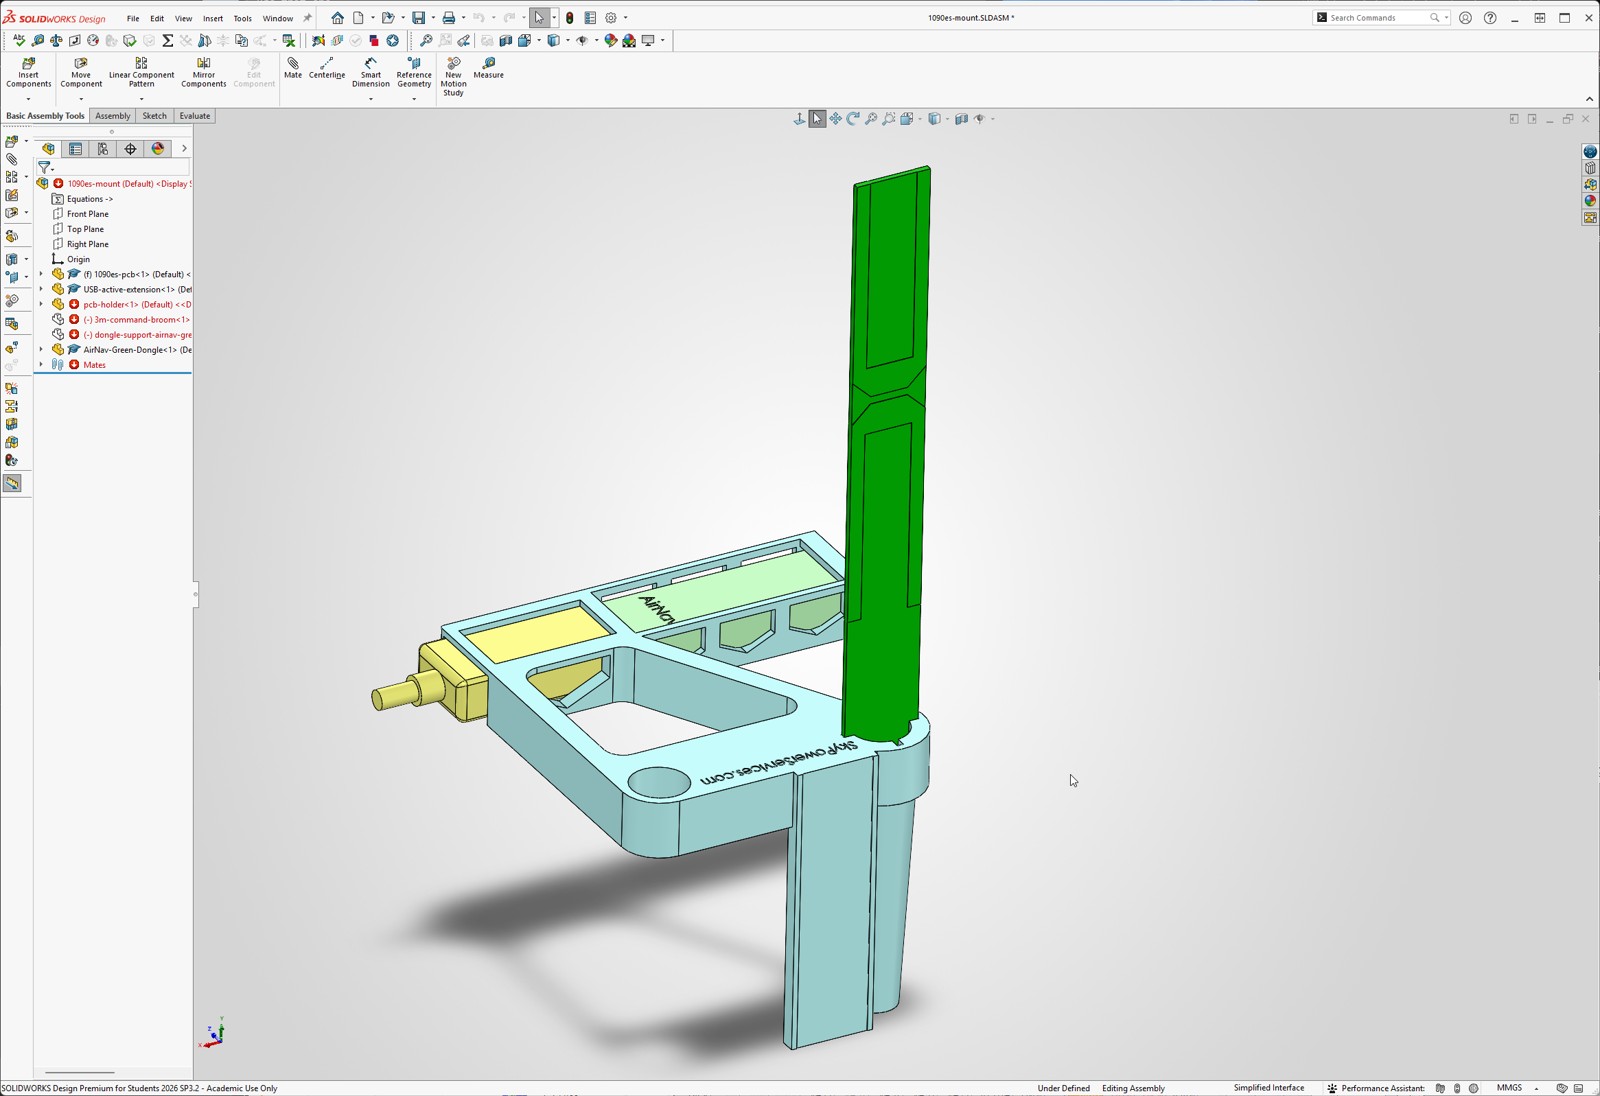
Three views of the actual design. Inspect your slicer settings, check fit, and choose material appropriate for a warm window. Keep receiver ventilation clear and support the cable separately.
The shopping list. Nothing mysterious.
Alongside your print, you need these five items and an internet-connected Windows 10/11 64-bit PC with USB. Choose one USB cable length.
- 12-inch SMA male-to-male coaxView on Amazon ↗
BINGFU RG316, 50-ohm, standard SMA at both ends — not RP-SMA. Two-pack; use one cable.
- Active USB extension — 5 m or 10 m
Cable Matters bus-powered USB 2.0 active extension, USB-A male-to-female. No separate power adapter needed. Choose the shortest length that reaches your PC.
- Green AirNav Radar FlightStickView on Amazon ↗
1090 MHz ADS-B USB receiver with integrated filter and amplifier. The green housing is the one this mount is designed around.
- 1090 MHz PCB antennaView on Amazon ↗
E-outstanding 1090 MHz ADS-B PCB antenna. Choose the pictured PCB version; check the connector and board fit before assembling.
- 3M Command large replacement stripsView on Amazon ↗
Four-pack; the mount uses just one strip. Follow 3M surface preparation, temperature, load, and removal directions.
Amazon product pages and listed specifications checked September 23, 2026. Listings can change; this is not a claim that every seller variant has been physically tested. Verify the selected item before purchase. USB power and reception depend on your PC and placement.
One Windows installer. Two useful jobs.
Internet Health IQ includes the integrated ADS-B receiver service and tools for understanding your internet connection — reachability, latency, packet loss, DNS, and route evidence. Feed aircraft observations while keeping an eye on the connection your business relies on.
Version 0.2.40 · Windows 10/11, 64-bit · 101.5 MB · digitally signed by Sky Power Services LLC
Verify the signed installer
This 0.2.40 installer is digitally signed and timestamped by Sky Power Services LLC. Confirm the verified publisher and checksum before installing. A signature identifies the publisher; it is not a guarantee that software is risk-free. If Windows or your organization blocks installation, stop and contact support or your administrator. Do not disable security controls.
Publisher-listed SHA-256:
AB776408CC5F5309DA32284157C530B018CF73A1A43D6CBF43BD2C72577413EFFrom printed part to live contribution.
- Assemble. Fit the antenna and receiver into the mount. Join their SMA connectors with the short coax, then connect the active USB extension to your PC.
- Find your view. Start with the antenna vertical at a window facing the airfield. Test reception before attaching the Command strip; metal screens and coated glass can reduce signal.
- Enable feeding. Run the installer and follow the receiver/driver setup prompts. Enable the ADS-B service and confirm it is receiving and sending observations. Keep the PC awake and online while feeding.
- Open Flightpatch. Search for your airport and select Kiosk for a clean display. Watch local activity and compare reception as you improve placement.
Already feeding with another setup? Keep it. This Windows build is an additional way to contribute; Linux and adsb.im instructions remain below.


Linux-based receiver: enable ADSB IQ in adsb.im
For existing adsb.im and Ultrafeeder appliances running on Raspberry Pi or another Linux computer.
- Open the adsb.im web interface and choose Setup.
- Enable ADSB IQ in the aggregator list.
- Save. Beast and MLAT feeds connect automatically.
Manual Ultrafeeder fallback:
adsb,feed.adsbiq.com,30004,beast_reduce_plus_out;mlat,feed.adsbiq.com,31090;Once connected, claim the feeder to name it and unlock its dashboard.
See what your feeder uniquely contributes →
Already connected? Claim your feeder
Already feeding through the official image or Ultrafeeder? Your station is on the map but listed as anonymous. Paste your station UUID to put your name on the leaderboard and unlock your dashboard.
📡 ADS-B — 1090 MHz
Already have an ADS-B receiver? Add ADSB IQ alongside your existing feeds in under a minute, with no conflicts.
Requirements
- A working ADS-B receiver (RTL-SDR dongle + antenna)
- Running readsb or dump1090-fa on Linux (Raspberry Pi, x86, etc.)
- Internet connection (minimal bandwidth — ~50 KB/s)
Already feeding adsb.fi, adsb.lol, FlightAware, FR24, or others? Perfect — ADSB IQ runs alongside them with zero conflicts.
Need a receiver?
The recommended Windows build is the easiest and much cheaper because it uses a PC you already own.
Build the recommended Windows receiver →Want to build on a Raspberry Pi (more expensive, but standalone)? →
Uninstall
To completely remove the feeder from your receiver:
(set -e; f=$(mktemp); trap 'rm -f "$f"' EXIT; curl --proto '=https' --proto-redir '=https' -fsSL https://adsbiq.com/uninstall.sh -o "$f"; sudo bash "$f")